
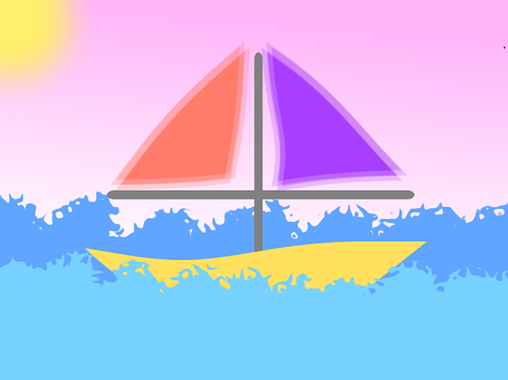
SailBoat

Boat
Insert a new layer, rename it "hull".


Select a color for your boat.

Select the Trapezoid shape tool. Set it to Fill Only.


Draw a trapezoid like this...

then drag the bottom circle to the top to flip it...

So you should have a boat shape like this...

Resize it so it's about this size. Position it near the bottom with just a bit of room below. [Enter] or click off the shape to set it.

Masts
Insert a new layer and call it "mast".


Set the colors back to default ...or make the primary color a grey.


Select the Shape Tool - choose Rounded Rectangle.

Draw out a mast like this...

Draw out a horizontal mast/beam like this (similar thickness as the vertical beam)...

Click on another tool or [Enter] to set the shape.
Move the mast layer behind/below the boat.


Sails
Insert a new layer, rename it "sail R". Make sure it's at the top.

Select the Shape Tool - and choose Right Triangle.

Set the Color for your sail.

Draw a triangle on the right...

Make sure you've drawn it in its own layer!

Now go to Effects>Distort>Bulge... and play with the sliders to get something like this.


Use the Rectangle Select tool to click and drag an outline of just the sail...


Now click on the Move Selected Pixels tool... and rotate the sail how you like. You can also make it a bit bigger/smaller.


[Enter] to set the position of the sail.
Insert a new layer, call it "sail L".

Change your color...

Select the Right Triangle shape tool again

Draw a triangle on the left...

Drag the middle circle on the right over to the left to flip it...

Now move the sail over into position...

Again go to Effects>Distort>Bulge and make the sail look like it's blowing in the wind...

Water
Insert a new layer, call it "water."

Select the Brush Tool...

Set the thickness to 100. Make sure hardness is 100%.

Set your primary color to blue.

Draw in wavy water above the boat.

Move the layer down so it's just above the Background layer.

Insert a new layer for "water front". Move it above the hull layer.

Change your color to a lighter/darker blue. Draw in some waves in front of the boat, slightly over the hull.

Make sure you draw it in the new layer, separate from the other water.

Sky
Select the Gradient Tool.

Set your color to a "sunset" color.

Make sure the Background layer is selected...

Then click and drag it down...

[Enter] to set the gradient.
Insert a new layer, rename it "sun".

Select the Ellipse Shape tool.

Set the color to yellow or orange for the sun.

Draw a circle for the sun off the top left corner.

Effects
Select the hull layer and go to Effects>Distort>Bulge and reshape it so it's more curved. Play with the 4-pointed arrow to get something like this..

Select the sun layer and go to Effects>Blurs>Gaussian Blur - blur it a bit to make it softer.

Select one of the sail layers and add the fragment effect (Effects>Blurs>Fragment). Just leave settings on default.

For the other sail layer, you can just choose Repeat Fragment at the top of the top of the Effects menu.


Select one of the water layers and go to Effects>Distort Dents

Then select the other water layer and Repeat Dents.

Clouds
Now insert a new layer at the top.

For this step, make sure your colors are the default (black & white).

Go to Effects > Render > Clouds...

Push the Roughness slider to the maximum, and say OK.

Add another Effect ... Blur > Fragment - play with the sliders and angle (you want to get a painting texture.

Double-click on the clouds layer to open layer properties. Change the blend mode to Overlay

